Thursday, 28 August 2014

Easy Crepe Paper Flowers on a Stem

Today I wanted to make a floral decoration so I made these Crepe Paper Flowers. They were a great craft to make and because I made four (in the colours purple, pink, red and white) they look perfect in a small vase together. I like this because it's sort of go-with-the-flow. You don't have to do many, one is good to put on a desk or shelf - a small decoration that looks nice but doesn't get in the way.For this craft I won't go into much detail but I have put a picture that should explain it all so follow that! Hopefully everyone will understand and be able to make this too! I if you have any queries leave a comment and I will answer as soon as possible!
What you will need...
  • Crepe paper (15cm by 15cm squares)
  • Stem wire (or find something outside)
  • Scissors 
  • Glue 
What to do...
  1. Fold in half - Fold your square of crepe paper in half, and then half again so you have a smaller square.
  2. Fold again - Fold diagonally so you have a triangle with two equal sides. Make sure one the corners of the equal sides is the centre point. I suggest unfolding to make sure this is the case. 
  3. Cut out a petal - Cut a petal shape from the corner that is the centre point leaving about 3 centimetres each side. (Definitely look at the picture for this step!)
  4. Cut off the corner - Cut the corner off to leave a hole in the centre. Start by doing a very small one, unfold and see if it needs to be bigger or not - chances are it will be fine. 
  5. Unfold and scrunch - Carefully unfold the petal to the flower shape with the hole in the middle. Scrunch up and twist each petal before opening it up - this makes it look more natural. 
  6. Stick the flowers to the stem - This is the part that might get slightly tricky: sticking the flowers to the stem. Glue the top centimetre of the stem. From the other side, slide the flower up until you reach the glue-covered part. Stick the centimetre around the hole as if you are sticking on tube to an inner tube. Then spread out the rest of the flower horizontally. Keep doing this until all of the flowers have been stuck. Be creative with this one! Experiment with  different colours and sizes.  I hope you have fun making these, and please leave a comment!


Tuesday, 26 August 2014

Newspaper Hanging Decoration

Hi! Welcome to my blog...

Today I made this newspaper hanging decoration ... thing... It is a fun and easy craft to make and is a great decoration! I just think it looks really pretty - you can use it on you door handle, hang it on a wall... Whatever you want! 

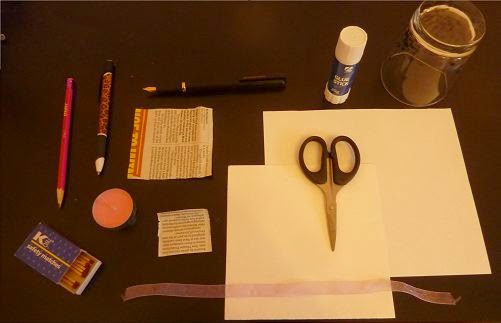
What you will need...
  • Newspaper scraps (preferably the text)
  • Paper 
  • Card
  • A candle (lighter)
  • Matchsticks (lighter)
  • Ribbon (20 cm - also string will do)
  • A glass (or anything circular to draw around)
  • A pencil
  • A pen (ink works best) 
  • Scissors
  • Glue stick
What to do...
  1. Stick the newspaper to the paper - First, stick you scrap of newspaper to the other piece of paper with some glue. Make sure to cover all area as you will be cutting this. 
  2. Draw the shape - Take the glass and lightly draw around it with the pencil onto the newspaper. You can use anything really - think about the size and shape. Hearts make it look really cute! 
  3. Cut out the shape - Cut around the shape leaving a small border (of around half a centimetre) - it doesn't have to be very straight or equal because you are just leaving enough room for the paper to get burnt.
  4. Light the candle - CAREFULLY light the candle with a match. Make sure you're not around any clothes or stuff that could easily catch fire. If you are using a lighter, skip this step.
  5. Burn the edges of the paper - Hold the tip of the newspaper shape and literally brush the edge into the flame before blowing it out (making sure there are no fiery lines slowly burning the rest of the paper). You might want to position yourself over a sink so you can just drop the paper if  the flame gets to big. Or get some water or a damp cloth. Another way to do it is get a super thick board of some sort and an oven glove - once it has been in the flame press down onto the board with the glove on. Do this to the whole edge giving a scorched effect. 
  6. Write the word or message - Take the pen and write whatever you want on the newspaper shape. I wrote LOVE, but you can put anything - your name, initials... - whatever! I think ink looks the best. I used a calligraphy pen, but a fountain pen or fine liner is great too. A ballpoint is fine though. Just one warning - the ink may bleed so I suggest testing it on the spare newspaper.
  7. Cut the card - Roughly draw around the newspaper shape onto the card with the pencil. Then draw the shape but leaving a centimetre wide gap inside so you have two shapes drawn. Cut out the inner shape and make sure when it is on one side of the newspaper, you can't see it form the other. 
  8. Stick the ribbon and card - Get out your ribbon (or string) and double it up so you have a loop. Completely cover one side of the piece of card in glue and stick 2 or 3 centimetres of the end to the card. Put glue over the ribbon and stick the card to the newspaper shape keeping in mind the top is where the loop is coming out from. Make sure it is securely stuck. Have fun and please leave a comment!